


Next: 7.3 Multiple workstation overview
Up: 7 Running GEIS
Previous: 7.1 Project selection window
Contents
This is a quick tour of the basic operations
in importing and compiling a script, and
then piloting an interview.
- Start GEIS
- Run GEIS. The project selection window appears
(Figure 6).
- Select a name from the left hand pull-down list.
- Select a project the right pull-down list.
In this case, select
the demonstration project: ``GEIS Demo''.
If it does not appear, refer to Section 4.6
for information on setting it up.
- Click the Standalone button.
The control panel appears
(Figure 7).
- If the error ``DATETIME is in the future'' appears:
(1) close GEIS;
(2) delete the CPANEL.SD2 and CPINFO.SD2 files
in the DATACATI library;
(3) delete the USERS.SD2 data set in the CATIlibrary;
and (4) restart GEIS.
Figure 7:
Control Panel
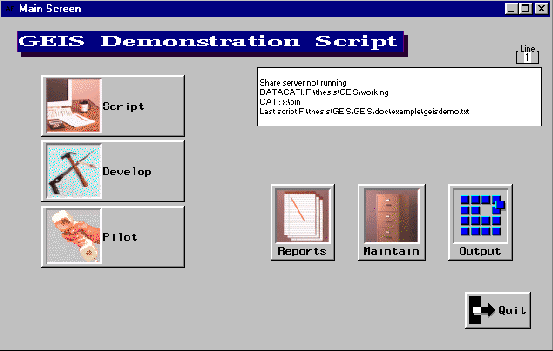 |
- Import the script
- Press the Script button.
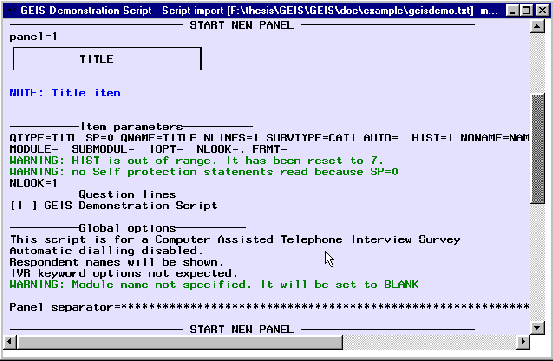
The script import window appears (Figure 8).
- Click the File button.
- Select the script and press OK.
- Press Import.
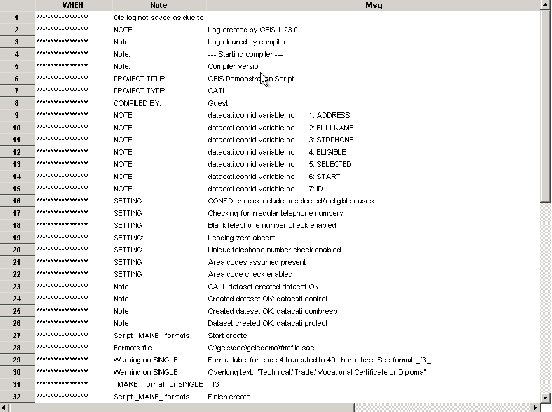
- A log window (Figure 9)
appears showing the results of the script import.
- Scroll through and look for error messages.
Close the window by pressing F3.
Figure 8:
Script Import Window
![\resizebox{\textwidth}{!}{
\includegraphics[clip=true]{/home/ross/research/GIS/GEIS/man/graphics/scriptimport.eps}}](img9.png) |
Figure 9:
Results of importing a script. Only the beginning of the
results are shown.
 |
- Compile the script
- Once a script has been successfully imported click
the exit button3 to close the script window
and return to the control panel.
- Press Develop.
The compiler window (Figure 10) appears.
- Press the Compile button.
Messages are displayed indicating the
progress of the compilation.
- Press the Log button
to examine compiler errors4.
If there are no errors the GEIS data sets are created and initialised.
- Exit the develop window by clicking the exit button.
- This returns you to the control panel.
Figure 10:
The compiler window.
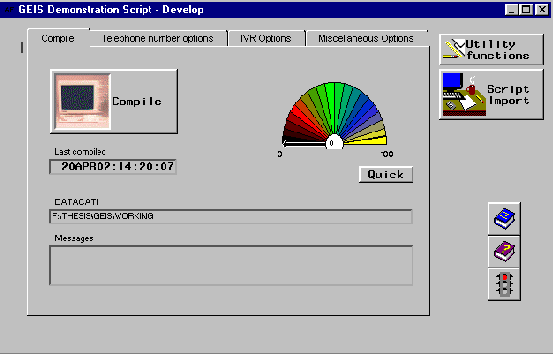 |
Figure 11:
Log window showing the results of compiling a script
 |
- Pilot test the script
- Press Pilot.
This starts the interviewing system, which is identical to
the interface used by the interviewers.
The interviewers' log-in window appears
(Figure 12).
- Click the down arrow and select the interviewer: ``Guest''.
In the password field enter ``impute''.
- Press the Enter
 key, then
click the start button.
key, then
click the start button.
- The respondent selection window appears
(Figure 13).
- Select a respondent from the pull-down list.
- Press OK.
- Click Call Answered.
- The interviewing window appears
(Figure 14).
Experiment with the interface.
- Complete the interview.
- When the interview is finished, select the
menu option Stop: Stop interview.
- This returns you to the respondent selection window
as long as you fully completed the interview.
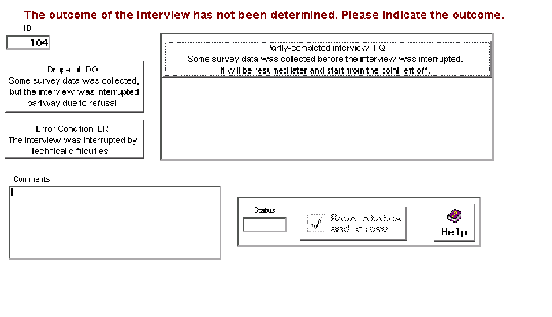
- However, if you exited the interview prematurely
you would have been returned to
the interrupted interview window
(Figure 15).
This window allows you to record
the status of the interview and make notes.
Exit this window.
Figure 12:
Log-in window for interviewers.
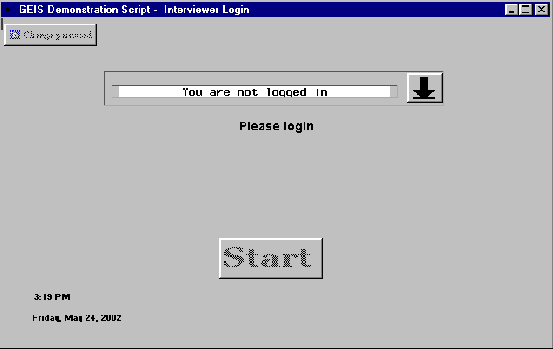 |
Figure 13:
Respondent selection window.
Individual respondents are selected here for interview.
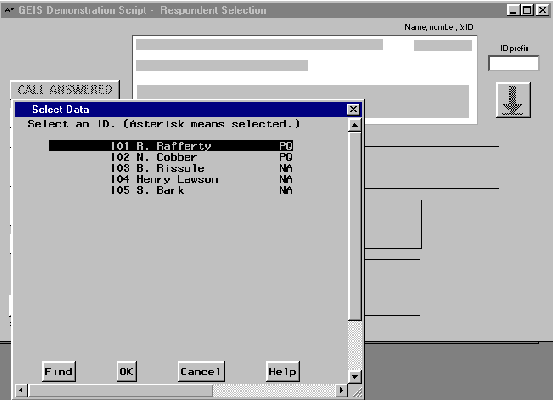 |
Figure 14:
Interviewing window. This shows one question at a time.
The displayed question (item type CHCE)
only accepts one answer from limited selection.
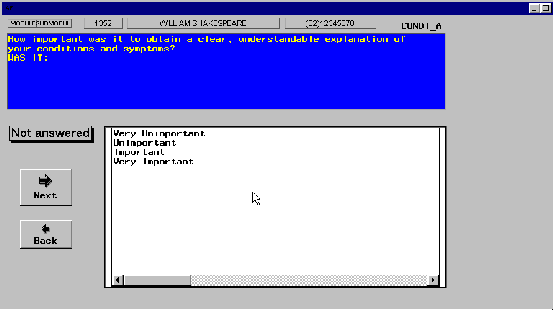 |
Figure 15:
Interrupted interview window.
It only appears when an interview is prematurely terminated.
This allows the interviewer to indicate the outcome.
 |
- Reports
- Click the View data button.
- The next window (Figure 16)
shows a series of buttons that
allow various data sets to be viewed in a variety of modes.
It does not allow editing.
Click the buttons to see what they do.
The data sets can be inspected whilst interviewing is in progress,
but only the data from those interviews that are completed
will appear.
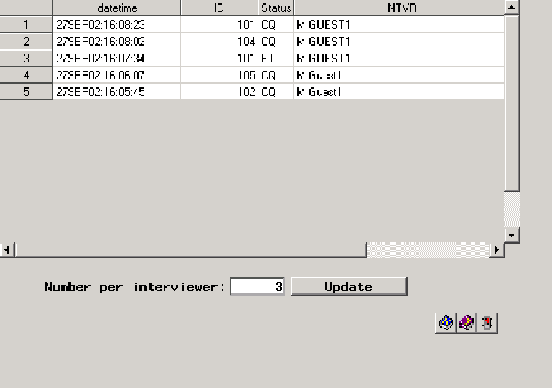
- Exit the window and click the Recent button
- The recent interviews window is displayed
(Figure 17).
- Click the Update button.
This cause GEIS to display the most recent completed interviews.
- Exit the window and then again exit the window.
Figure 16:
Data set view window.
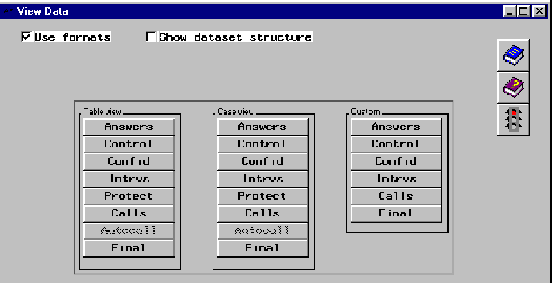 |
Figure 17:
Recent interviews window.
 |
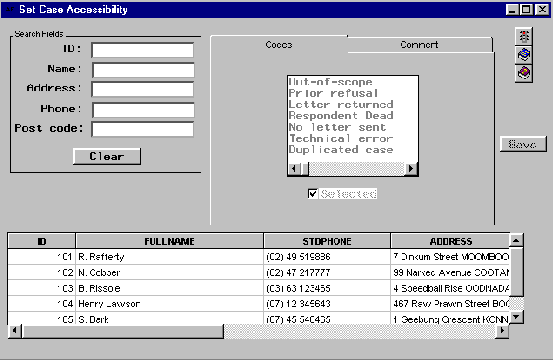
- Maintenance
- Click the Maintain button.
- Click the Modify Interview Codes button.
- This window (Figure 18)
allows the status of individual interviews to be
manually modified, should that be necessary.
- Exit the window.
- Click the Interviewer details window.
This window allows interviewers' details to be manually modified.
- Exit the window and then again exit the window.
Figure 18:
Edit interview codes window.
 |
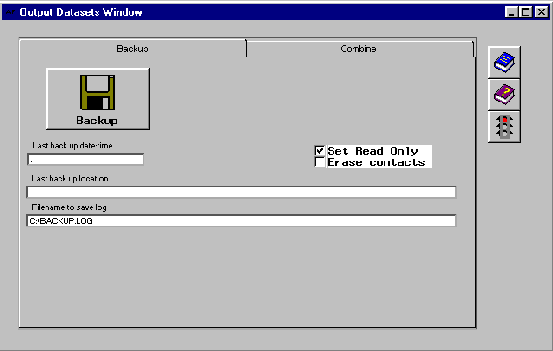
- Output
- Click the Output button.
- The back-up and combine data sets window
(Figure 19)
is displayed.
- Clicking the Back-up button
allows all the data sets and DEFINIT catalogue
to be copied to another location.
- The Combine tab shows the Combinedata sets button.
- Click the Combine data sets button
creates a new data set called FINAL that contains data from the ANSWERS
and CONTROL data sets,
as well as splitting up any MULT item
answers that exist.
- Exit the window and then again exit the window.
Figure 19:
Backup window.
 |
- Exit GEIS
- The control panel reappears.
- To exit the program, click the exit button.
Next: 7.3 Multiple workstation overview
Up: 7 Running GEIS
Previous: 7.1 Project selection window
Contents
Ross Corkrey
2006-02-14